 Volumetric Light Beam Component HD
The VolumetricLightBeamHD and VolumetricLightBeamHD2D components are the main components of the HD implementation of the plugin. They can be attached to any GameObject.
HD Beams require access to the Depth Buffer. More info here.
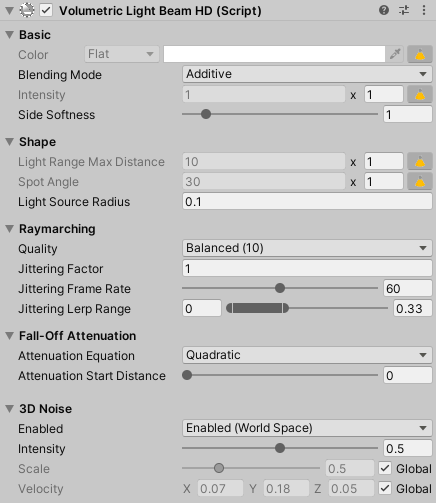
Basic
Color
Use the combobox to specify if you want to apply a Flat/Plain or a Gradient color.
Flat
Use the color picker to set a plain color (takes account of the alpha value).
If attached to a Spotlight, toggle the  button next to this property to get the same value than the Color Light's property.
If the Spotlight uses Color Temperature Mode, enable the option in the plugin config so the beam's color takes account of both the filter and the temperature.
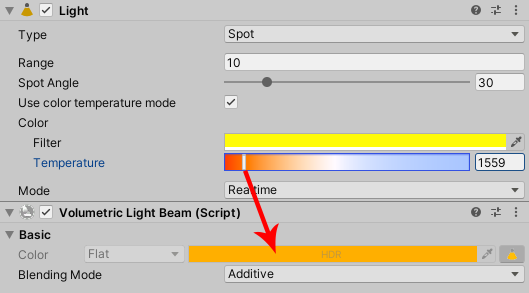
Tip about HDR
You can specify an HDR color value. If your camera allows HDR, it's possible that the light beams look more transparent. In this case, increase the Current Brightness in the HDR color picker to make them look more opaque.
Gradient
Apply a gradient along the light beam. The color and alpha variations will be applied.
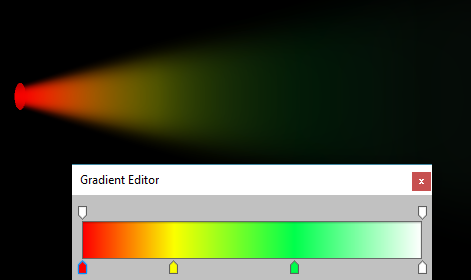
Gradient accuracy
When applying gradients with a lot of color changes, you might need to increase the mesh's Segments tesselation in order to have a better rendering accuracy, or you can also set the Shader Accuracy to High.
Blending Mode
Change how the light beam colors will be mixed with the scene. More info about Blending Mode here.
- Additive: highly recommended blending mode. Gives the best results when using bright colors.
- Soft Additive: softer additive (bright colors will appear dimmed).
- Traditional Transparency: use this only if you want to have beams with dark/black colors.
 |
 |
 |
|---|---|---|
| Additive | Soft Additive | Traditional Transparency |
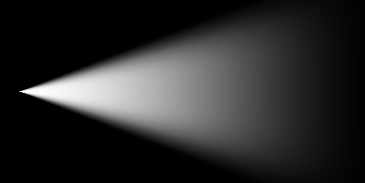
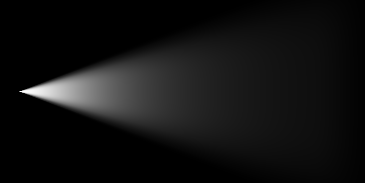
Intensity
Global beam intensity. If you want to control values for inside and outside independently, use the advanced mode.
If attached to a Spotlight, toggle the button next to this property to get the same value than the Intensity Light's property.
A new Multiplier property will be available to modulate the spotlight intensity.

Exposure Weight (HDRP only)
Use this slider to set how much effect the exposure has on the beam intensity.
 |
 |
 |
|---|---|---|
| Scene exposure: regular | Scene exposure: high Exposure weight: 0.0 (Beams' intensity hasn't changed) |
Scene exposure: high Exposure weight: 1.0 (Beams' intensity is dimmed down) |
The Exposure Weight property is only available when using HDRP since the exposure is only handled in this Render Pipeline.
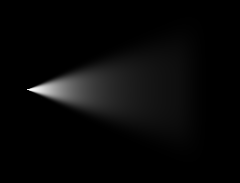
Side Softness
Smoothness of the beam when looking at it from the side, controlling how soft it looks on the edges.
- 0.0 = the beam is fully visible with hard edges.
- Higher values produce softer transition at beam edges.
Shape
Light Range Max Distance
Distance from the light source (in units) the beam is entirely faded out.
If attached to a Spotlight, toggle the button next to this property to get the same value than the Light Range Max Distance Light's property.
A new Multiplier property will be available to modulate the range distance.

You can control this value from script using the fallOffEnd property.
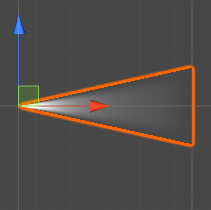
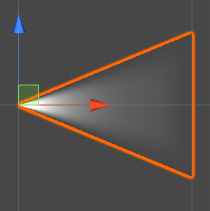
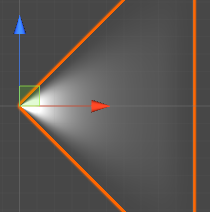
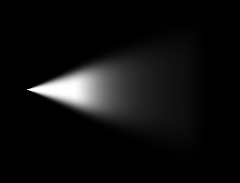
Spot Angle
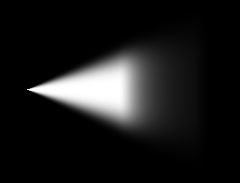
Define the angle (in degrees) at the base of the beam's cone.
 |
 |
 |
|---|---|---|
| 25 degrees | 45 degrees | 90 degrees |
If attached to a Spotlight, toggle the button next to this property to get the same value than the Spot Angle Light's property.
A new Multiplier property will be available to modulate the angle.

Light Source Radius
Radius (in units) at the beam's source (the top of the cone).
- 0.0 will generate perfect cone geometry (with a sharp apex).
- Higher values will generate truncated cones.
 |
 |
|---|---|
| 0.0 | 0.25 |
Increasing the Light Source Radius property will not increase the Spot Angle. This means that the cone's maximum radius is not dependent on the Light Source Radius property.
Is Scalable
The scaling of the beam's GameObject (or any of its parent in the hierarchy)...
- True: ...will be applied to the beam itself and will change its size.
- False: ...won't be applied to the beam itself, so the beam won't have its size changed.
In short, we recommend to set the Scalable property at:
- True when there is no Unity Light attached to the same GameObject, so you will be able to scale your beam easily.
- False when there is a Unity Light attached to the same GameObject, because the Unity Light are NOT scalable: this way you beam will always fit the Unity Light size.
Raymarching
Quality
Specify which raymarching quality you want to use for this beam (the higher the steps count, the better the quality, the slower the performances).
The different qualities names and steps count can be configured from plugin's config.
 |
 |
 |
|---|---|---|
| Quality = Fast (5 Steps) |
Quality = Balanced (10 Steps) |
Quality = High (20 Steps) |
Jittering Factor
When using Shadow or Cookie with a raymarching quality with too low steps count, some banding artifacts can appear.
In this case, increase jittering to add noise to smooth raymarching inaccuracy.
 |
 |
|---|---|
| Jittering Factor = 0.0 | Jittering Factor = 1.0 |
Jittering Frame Rate
Animate the jittering noise texture over the time:
- 0 = the jittering won't be animated.
- Higher values = the jittering will be animated more often.
Jittering Lerp Range
Configure where the jittering will be visible along the beam. This range is specified between 0 (the tip of the beam) and 1 (the end of the beam):
- before the range: no jittering
- in the range: jittering will lerp from 0 to Jittering Factor value
- after the range: Jittering Factor value
Fall-Off Attenuation
Attenuation Equation
Attenuation equation used to compute fading between Attenuation Start Distance and Light Range Max Distance.
- Linear: Simple linear attenuation.
- Quadratic: Quadratic attenuation. Since this is the way light behaves in real life, this usually gives more realistic results than the linear attenuation.
 |
 |
|---|---|
| Linear | Quadratic |
Attenuation Start Distance
Distance from the light source (in units) the beam intensity will start to fall off.
 |
 |
 |
|---|---|---|
| 0% | 25% | 50% |
You can control this value from script using the fallOffStart property.
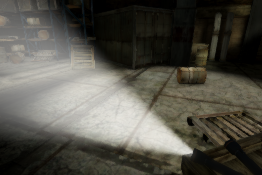
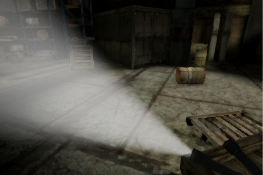
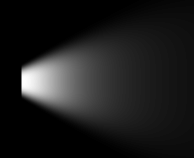
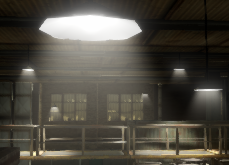
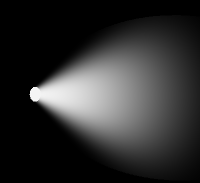
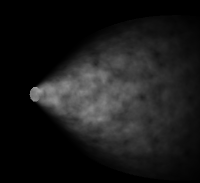
3D Noise
3D Noise is a feature to simulate animated volumetric fog / mist / smoke effects. It makes the volumetric lights look less "perfect" and so much more realistic.
To achieve that, a tiled 3D noise texture is internally loaded and used by the beam shader.
 |
 |
|---|---|
| 3D Noise OFF | 3D Noise ON |
Platform specific
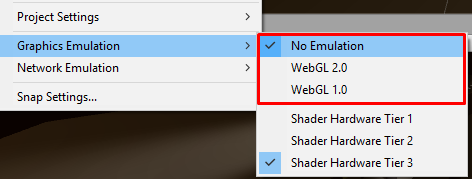
3D Noise feature requires shader capabilities equal or higher than Shader Model 3.5 / OpenGL ES 3.0. Any mobile devices released after 2012 should support it.
If you want to test the 3D Noise compatibility from the Unity's editor, or if the effect is not visible in the scene view, please change the editor's graphics emulation for a more capable one via 'Edit/Graphics Emulation' menu and press Play to force the light beams to be recomputed.
Enabled
Enable or disable the 3D Noise effect and select the mode. The mode you select will change how the noise will look when the beam is moved in realtime.
- Disabled: 3D Noise effect is disabled.
- Enabled World Space: when moving your beam, the noise will look "grounded" in the world.
- Enabled Local Space: when moving your beam, the noise will look "tied" to the beam.
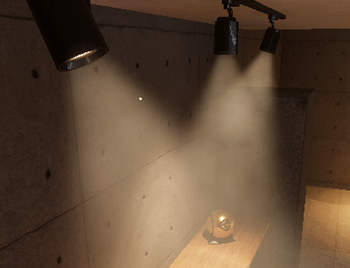
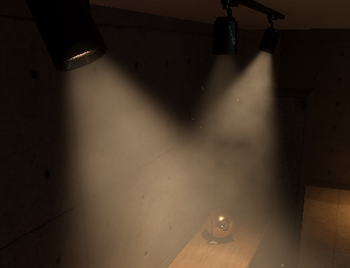
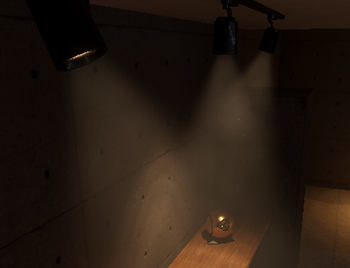
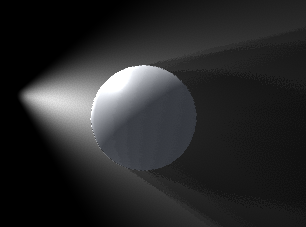
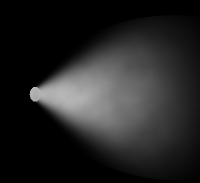
Intensity
Higher intensity means the noise contribution is stronger and more visible.
 |
 |
 |
|---|---|---|
| 0.0 (disabled) | 0.5 | 1.0 |
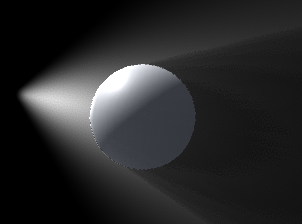
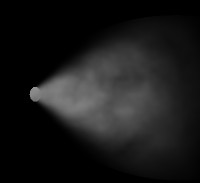
Scale
3D Noise texture scaling. Higher scale makes the noise more visible, but potentially less realistic because the texture tiling could become more apparent.
 |
 |
 |
|---|---|---|
| 0.4 | 0.8 | 1.4 |
If the toggle Use Global is checked, it will use the global Scale property set in configuration file.
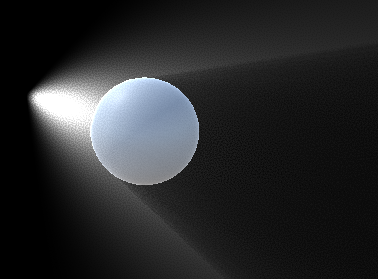
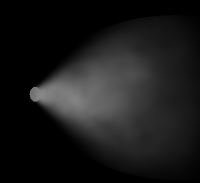
Velocity
Vector3 property defining the direction (the direction of the vector) and speed (the magnitude of the vector) of the noise scrolling, simulating the fog/smoke movement.
 |
 |
|---|---|
| (0.05 ; 0.2 ; 0.05) | (0.05 ; 0.05 ; -0.3) |
If the toggle Use Global is checked, it will use the global Velocity property set in the configuration file.
2D
The following properties are only available with the VolumetricLightBeamHD2D component and are used to tweak and combine the order when beams are rendered with 2D objects (such as 2D sprites).
Dimensions
- 3D: the beam is generated along the Z axis.
- 2D: the beam is generated along the X axis, so you won't have to rotate it to see it in 2D.
We recommend to set this property at 2D when displaying a beam in a 2D scene:
- You won't have to apply an extra rotation transformation to make the beam visible
- The TriggerZone will generate a 2D Polygon Collider then
Sorting Layer
The layer used to define this beam's overlay priority during rendering with 2D Sprites.
This works the same way than the Sorting Layer property of the Sprite Renderer class.
Order in Layer
The overlay priority within its layer. Lower numbers are rendered first and subsequent numbers overlay those below.
This works the same way than the Order in Layer property of the Sprite Renderer class.